THE BREXTON SCARF © Project Weekend Creative LTD. 2019
👉 QR links can break and pattern cards can go missing, so ensure seamless access to your pattern. COPY, PASTE & SAVE it to your device.
You can even print it out for some #offlineviewing enjoyment!
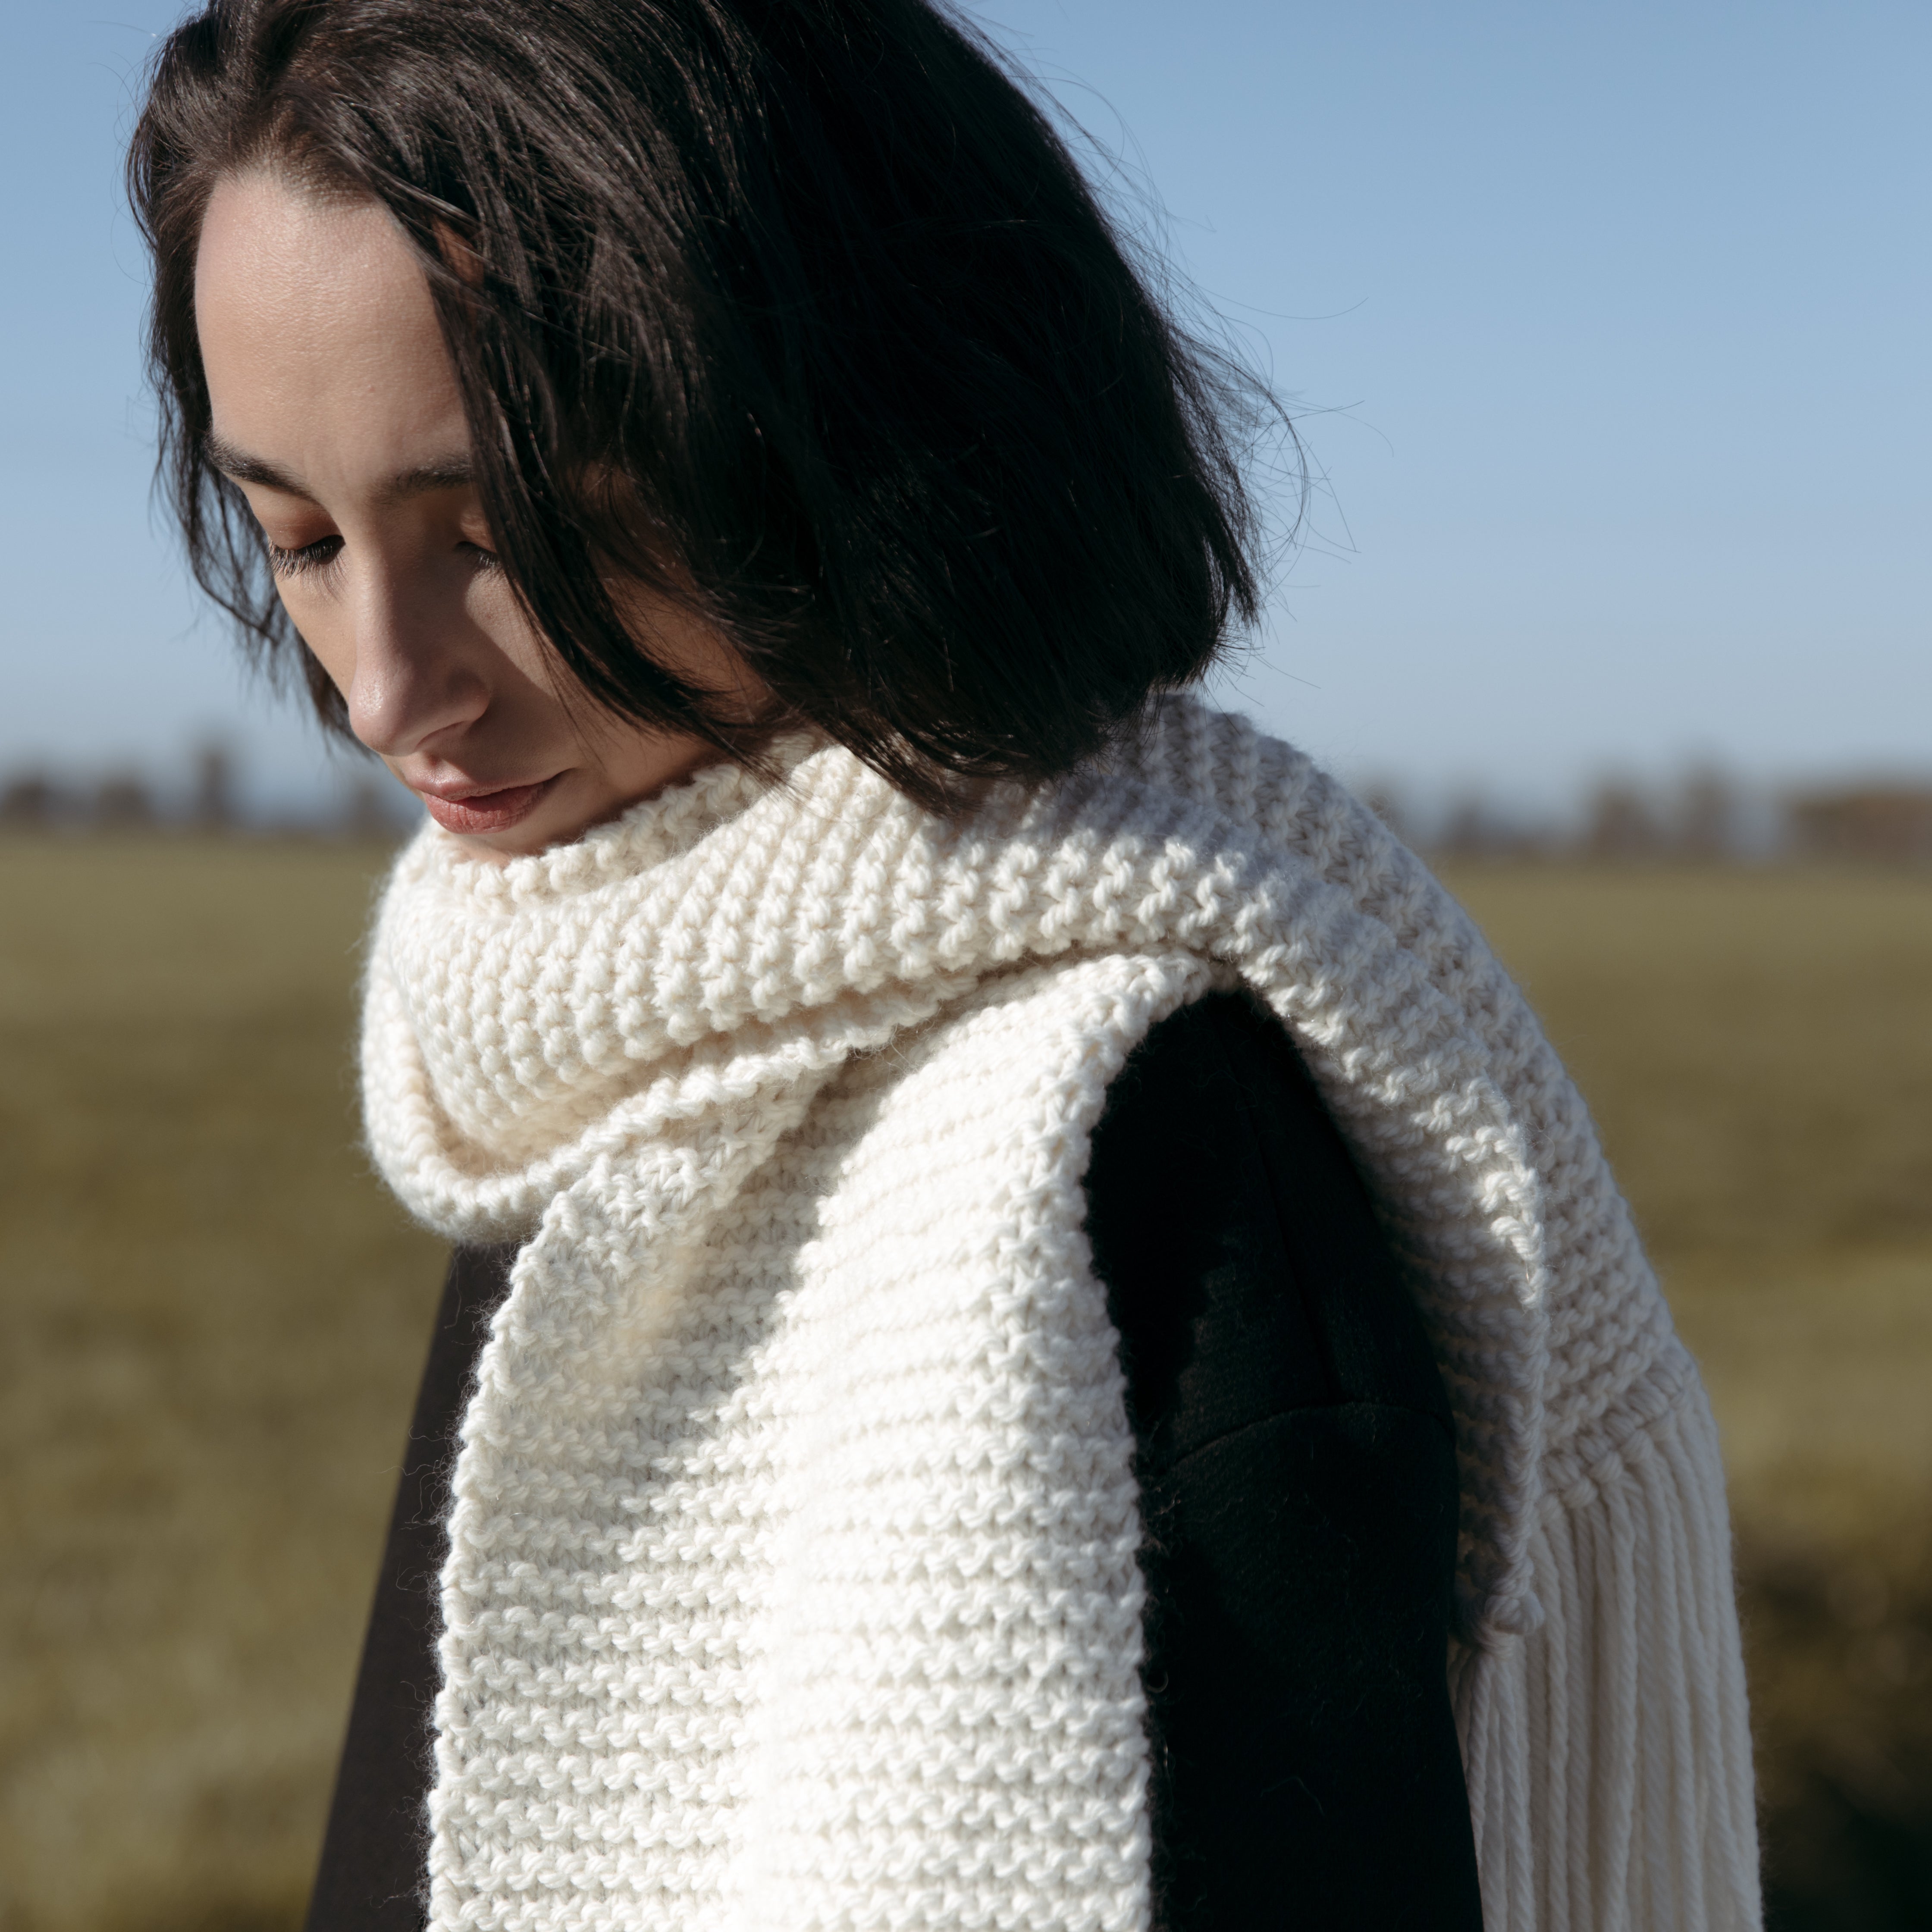
BREXTON SCARF
A PROJECT WEEKEND LEARN-TO-KNIT PATTERN
Our Learn-To-Knit patterns include easy to follow, fully detailed step-by-step pattern instructions, how-to video tutorials and illustrated technique diagrams.

One of the best styles for learning how to knit is a scarf pattern. Why? Because it's simple. You don't have to worry about creating shape or how it will fit, it's just a big beautiful rectangular piece of fabric designed to wrap you up in soft-as-a-kitten warmth.
Beginning with a simple project allows you to get into a rhythm so that your brain and your hands learn to work together with the needles and yarn. At the heart of it, repetition helps build confidence. Choosing a scarf with a single basic knit stitch, like our Brexton Scarf pattern, makes it a great first project, setting you up to feel proud of what you've created.

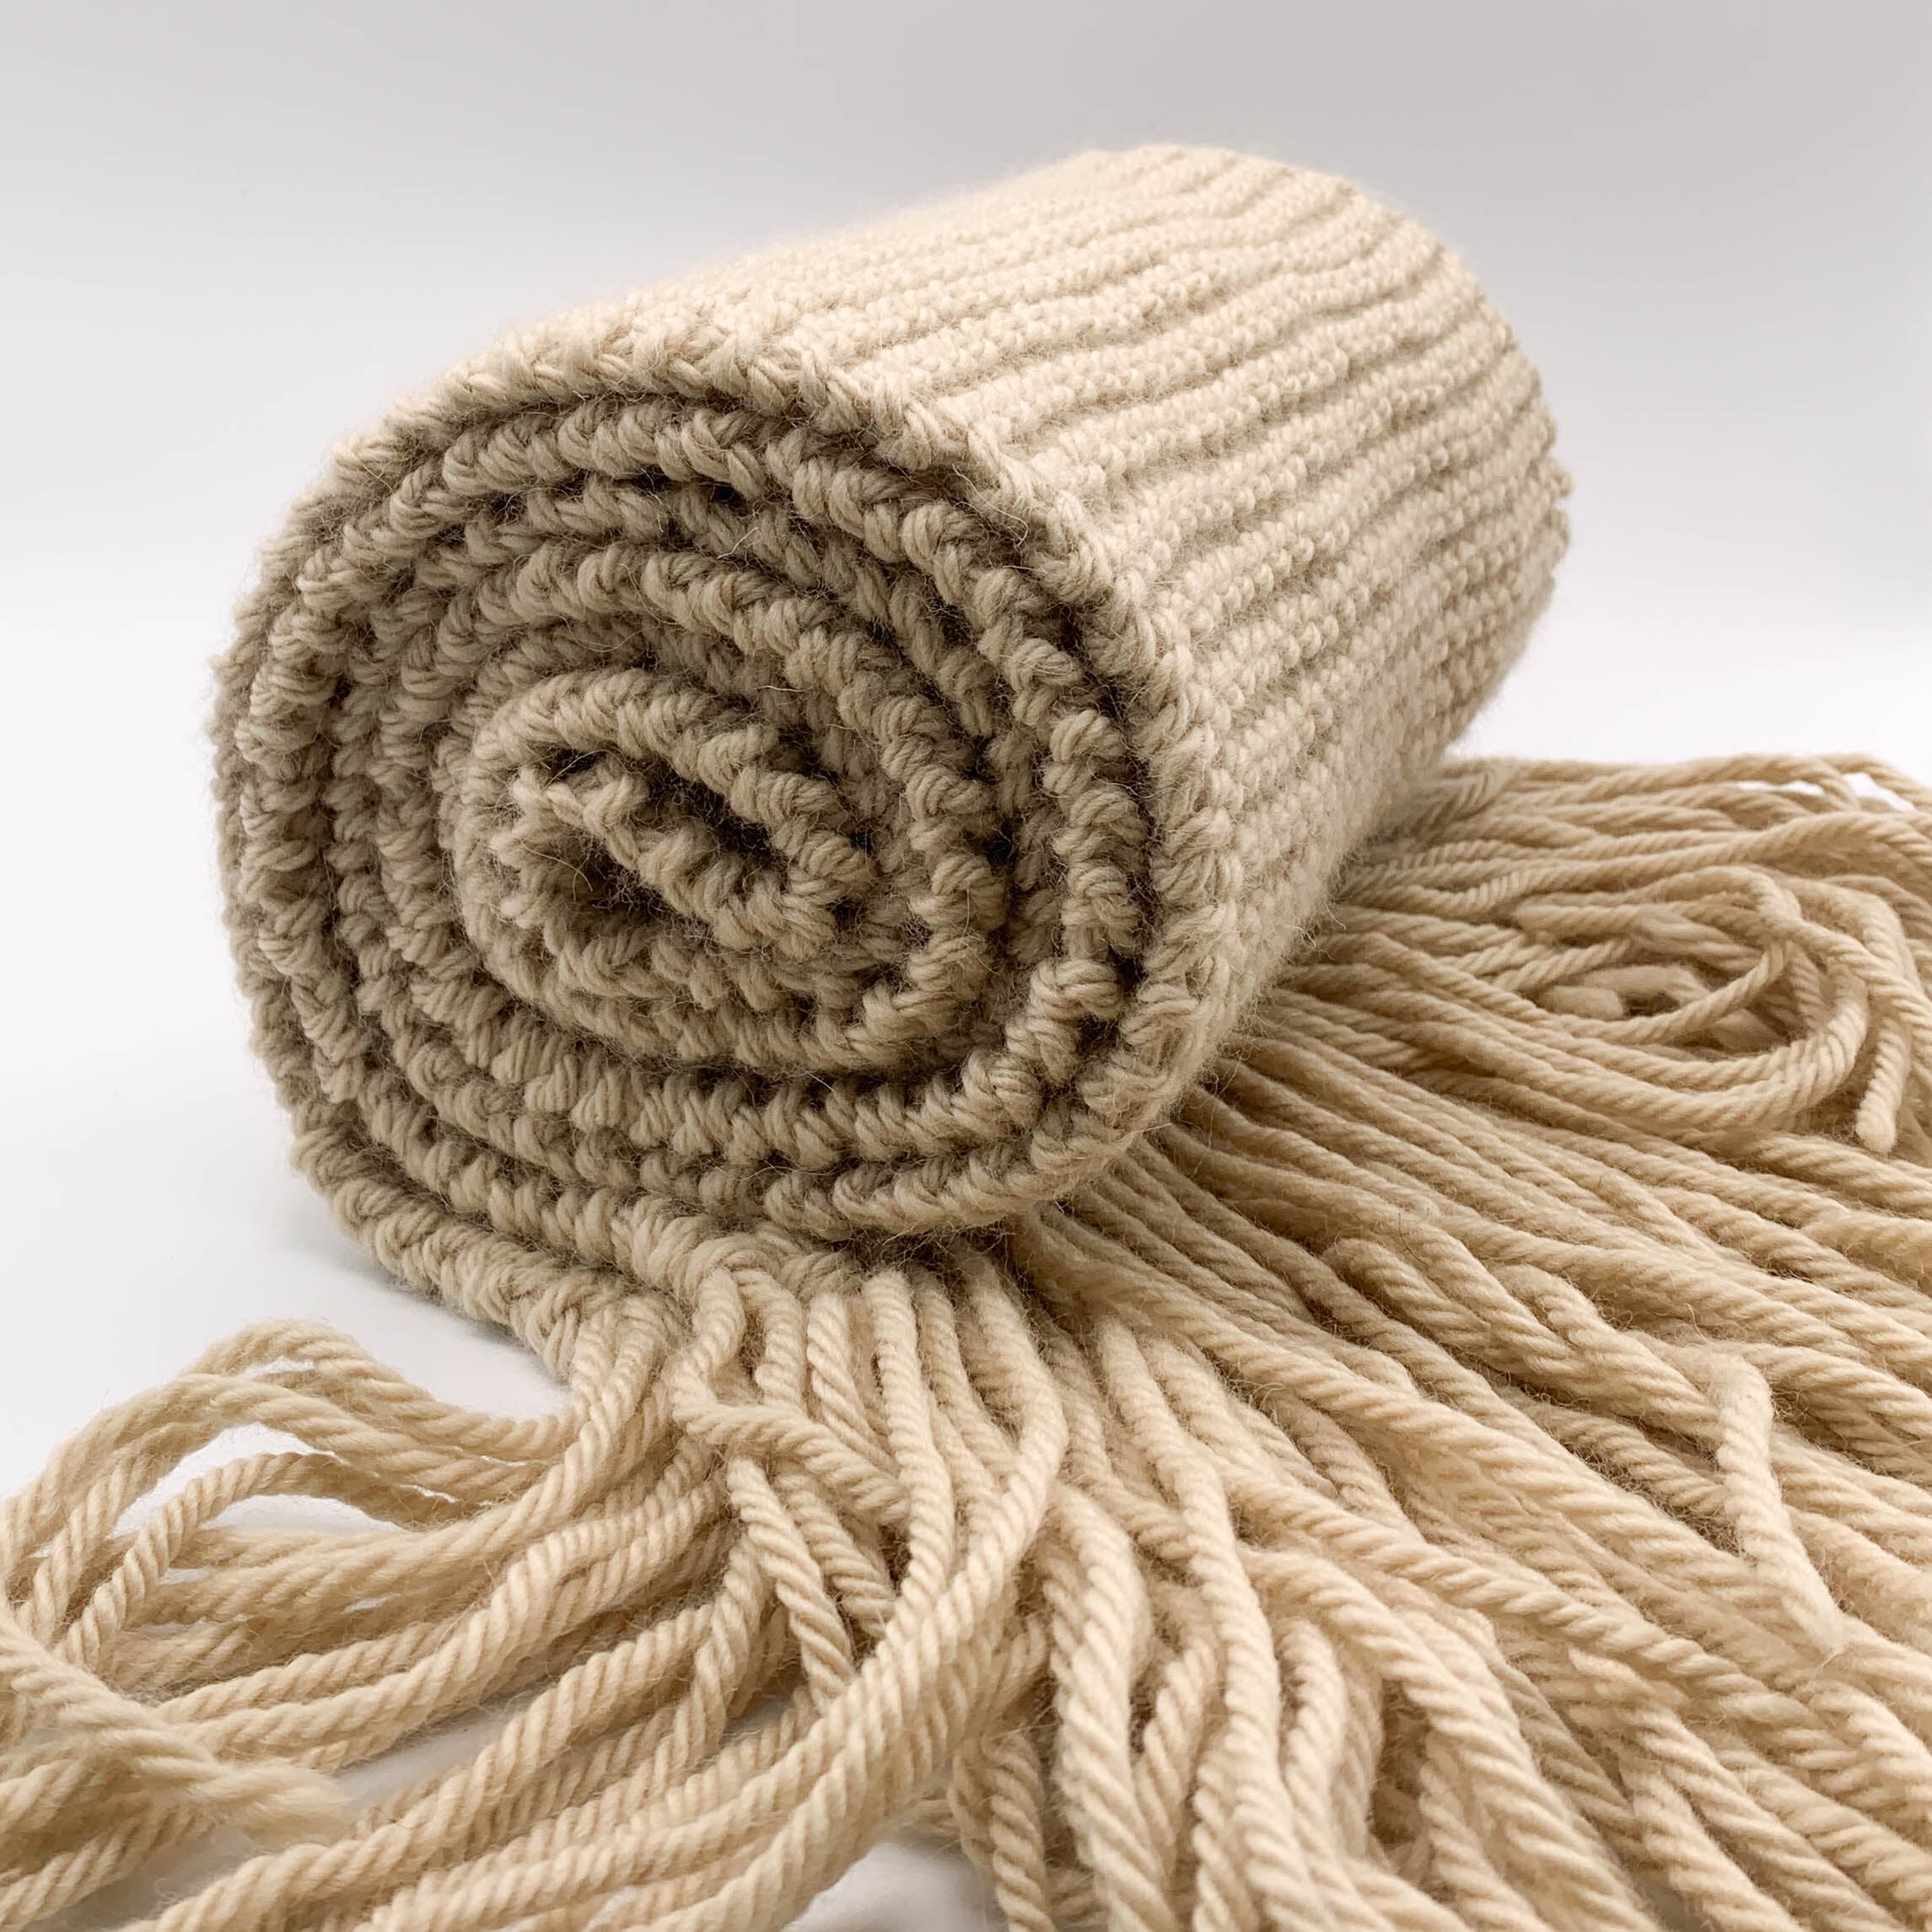
The generous width and extra long length of the Brexton Scarf allows it to drape dramatically around your body to create layer upon layer of luxurious softness.

Our LOLL yarn features a special blend of Merino Wool and Baby Alpaca fibers creating soft-as-a-kitten warmth and squishiness. Sustainably sourced and 100% naturally soft, (not chemically softened), LOLL is grown in the beautiful highlands of Peru and Argentina and spun in a Fair Trade Certified facility.

With cashmere-like softness, LOLL is not too chunky or hot, making it a perfect choice for all of your upcoming projects (hats, scarves, sweaters, blankets, cowls, interiors accessories). And because it's naturally anti-itch, it's perfect for all those baby gifts you want to make or for anyone who is sensitive to the itch of natural wool.
PROJECT SKILL LEVEL : LEARN TO KNIT
This pattern is designed for anyone who is picking up knitting needles for the very first time. We will guide you step-by-step on how to get yarn onto your needles, teach you the foundational knit stitch and how to finish your work in a way that looks ultra professional.
TECHNIQUES YOU WILL LEARN
- How To Hold Your Needles & Yarn
- Making a Gauge Swatch
- The Slip-Knot
- Casting-On Stitches (using the Longtail Cast-On Method)
- The Knit Stitch
- Joining Yarn Ends
- Binding Off
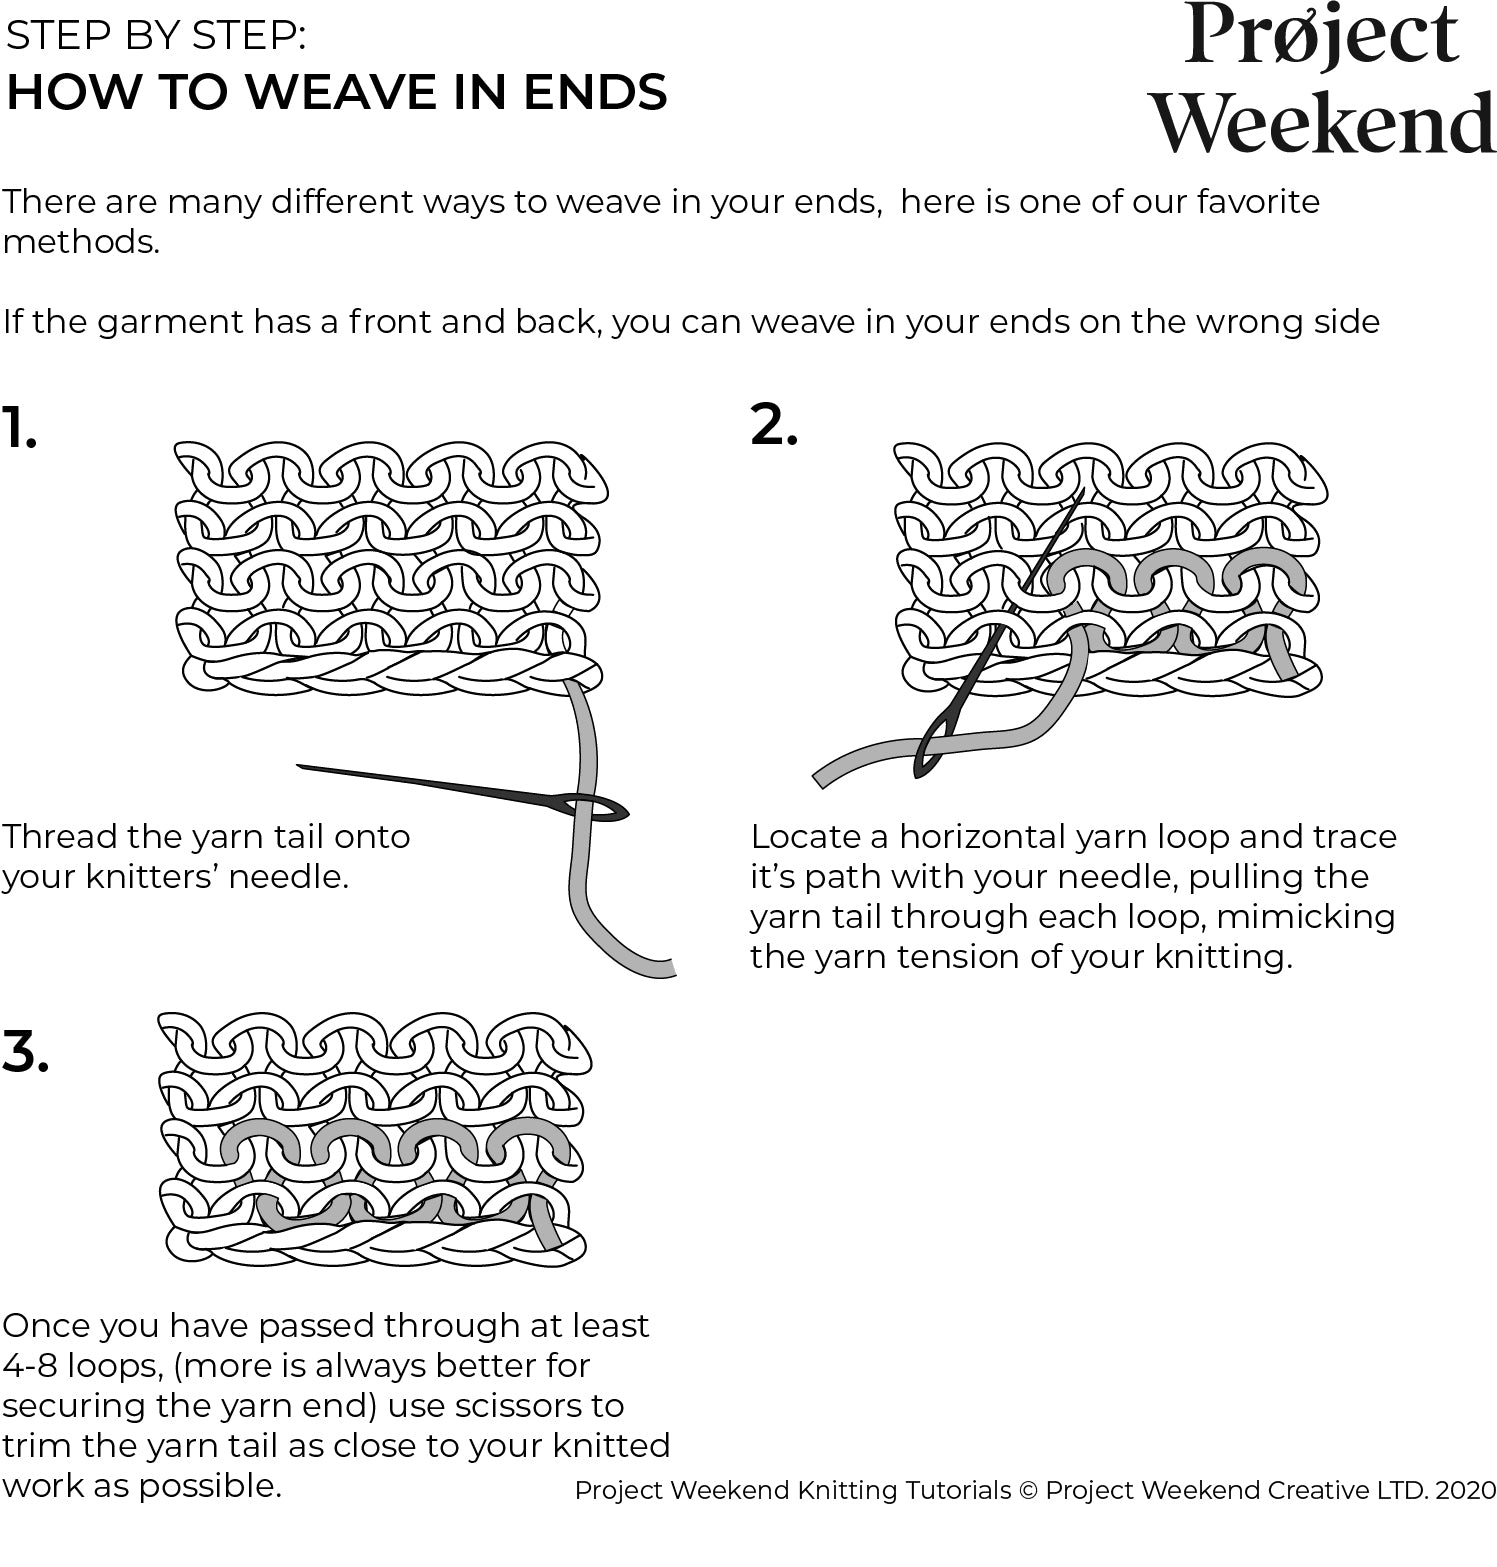
- Weaving In Loose Ends
- Adding Fringe
TIME TO MAKE
10-12 Hours
PATTERN SIZE
One Size
PROJECT MEASUREMENTS
Finished Length: 65” (with fringe 82”)
Finished Width: 8.5”
GAUGE
13 stitches in knit stitch x 22 rows = 4" x 4" square
BREXTON SCARF KIT

SPEND MORE TIME MAKING AND LESS TIME RUNNING AROUND SOURCING SUPPLIES. Project Weekends' all-in-one Brexton Scarf Kit contains all of the necessary tools and supplies to get you started. (Knitting Needles optional with kit purchase)
KIT CONTENTS
- 3 balls of Project Weekend's LOLL, our exclusive naturally soft, not chemically softened 65% Fine Peruvian Highland Wool / 35% Superfine Peruvian Alpaca yarn. Each ball weighs 125 GR. (4.4oz) and has 125m (137y).
- 1 pair of 8mm / US 11 Knitting Needles (optional with kit purchase)
- 1 9mm / M/N-13 crochet hook (optional with kit purchase)
- 1 Knitters' Sewing Needle
- 1 "PROJECT WEEKEND X Me." Woven Label
- 1 "Made For You" Maker Gift Hangtag
- 1 Organic Cotton Project Bag

TECHNIQUE TUTORIAL VIDEOS & ILLUSTRATIONS
Not sure how to knit a specific technique? No worries, we've got your back! We've created videos and step-by-step illustrations for you to reference, so your project won't miss a beat. They are conveniently located throughout and at the end of the pattern for you to click and learn from.
Happy Knitting!
LET'S BEGIN
Before we start getting into it, let's familiarize ourselves with how we hold our needles and yarn.
GAUGE SWATCH
WHAT IS IT & WHY MAKE ONE
A gauge swatch is a little test square of fabric that you knit before each project using the exact stitches in your pattern. Once complete, it will tell you if your knitting tension is too tight or too loose for the pattern that you are creating. This is a great tool because it helps you make sure that what you are knitting will measure out perfectly to the pattern and ultimately fit right.
Gauge swatches only take a half hour or so to make... many times less. Yet, a lot of people either rush through this process or skip it all together because they're so excited to get into knitting their project.
Please learn from our experience.....there is nothing more frustrating than knitting someone a sweater only to realize at the end (and after many invested hours of knitting) that if only we had made a gauge swatch, that beautiful sweater wouldn't have ended up fitting two sizes too small.
If you are new to knitting, think of the gauge swatch as a great opportunity to learn how to create your stitches before you start your main project.
GETTING GAUGE
Every knit project will have gauge swatch instructions. The pattern details and materials list will indicate what size needle you need for each project and it will call out how many stitches per row by how many rows you need to knit to create your swatch to achieve the correct gauge.
As you can see, The Brexton Scarf requires an 8mm sized knitting needle and you will need to cast-on 13 knit stitches and knit 22 rows to achieve gauge. Once you complete this, your finished swatch should measure 4” x 4” (10cm x 10cm).

STEP-BY-STEP : MAKING A GAUGE SWATCH
1. With a yarn tail approximately 20” long, create a SLIP-KNOT and place it onto one of your knitting needles. This slip-knot is considered your first stitch.
HOW TO MAKE A SLIP KNOT
2. Holding that needle in your right hand, CAST-ON another 12 more stitches using the LONG-TAIL CAST-ON METHOD. You should now have 13 stitches on your needle.
HOW TO CAST-ON USING THE LONG-TAIL CAST-ON METHOD
3. Hold the needle with the stitches in your left hand and the empty needle in your right hand. KNIT into each of the loops across the 13 stitches. This is row 1.
HOW TO KNIT THE KNIT STITCH
4. Switching needles again, hold the needle with the stitches in your left hand and the empty needle in your right hand. This is called turning your work and you will do this each time you knit to the end of each row.
5. Repeat Knitting each row until you have completed a total 22 rows
6. BIND-OFF your stitches (Do not cut yarn after binding off, you'll be using this yarn for your main project.)
HOW TO BIND-OFF (CAST-OFF)
7. Lay your swatch flat and measure the length and the width. If your swatch comes out smaller than 4”x4”, it means you are knitting too tightly, so unravel your swatch and start again, this time loosen up your stitch tension a bit.
If your swatch comes out larger than 4”x 4”, you are knitting too loosely, so tighten up your stitch a little bit when knitting.
Once you create a swatch that measures 4”x 4”, Congratulations! you have found your gauge tension so go ahead, unravel that swatch (you're going to need that yarn for your scarf!) and begin your knit project.
MEASUREMENTS OFF BY A TINY BIT?
No stress! When you’re working on beginner projects like this, it’s ok to be a bit off on measurements. Once you've completed knitting your scarf, we will show you how to block it. Blocking your work is a way of "setting" your knitting to hit the exact measurements you need and is the way to take your knitting from looking home made to super professional.
So, if you’re just a bit off on measurement.... go ahead, start knitting that scarf!
BREXTON SCARF PATTERN
LE'TS GET TO IT!
1. With a yarn tail approximately 20” long, create a SLIP-KNOT and place it onto one of your knitting needles. This slip-knot is considered your first stitch.
2. Holding that needle in your right hand, CAST-ON another 27 more stitches using the LONG-TAIL CAST-ON METHOD. You will now have 28 stitches on your needle.
3. Hold the needle with the stitches in your left hand and the empty needle in your right hand. KNIT across the 28 stitches.
4. Switching needles again, hold the needle with the stitches in your left hand and the empty needle in your right hand. This is called turning your work and you will do this each time you knit to the end of each row.
5. KNIT across the 28 stitches and turn your work.
6. Repeat this process of knitting across the row and turning your work until you reach the last 10” of yarn of your first ball.
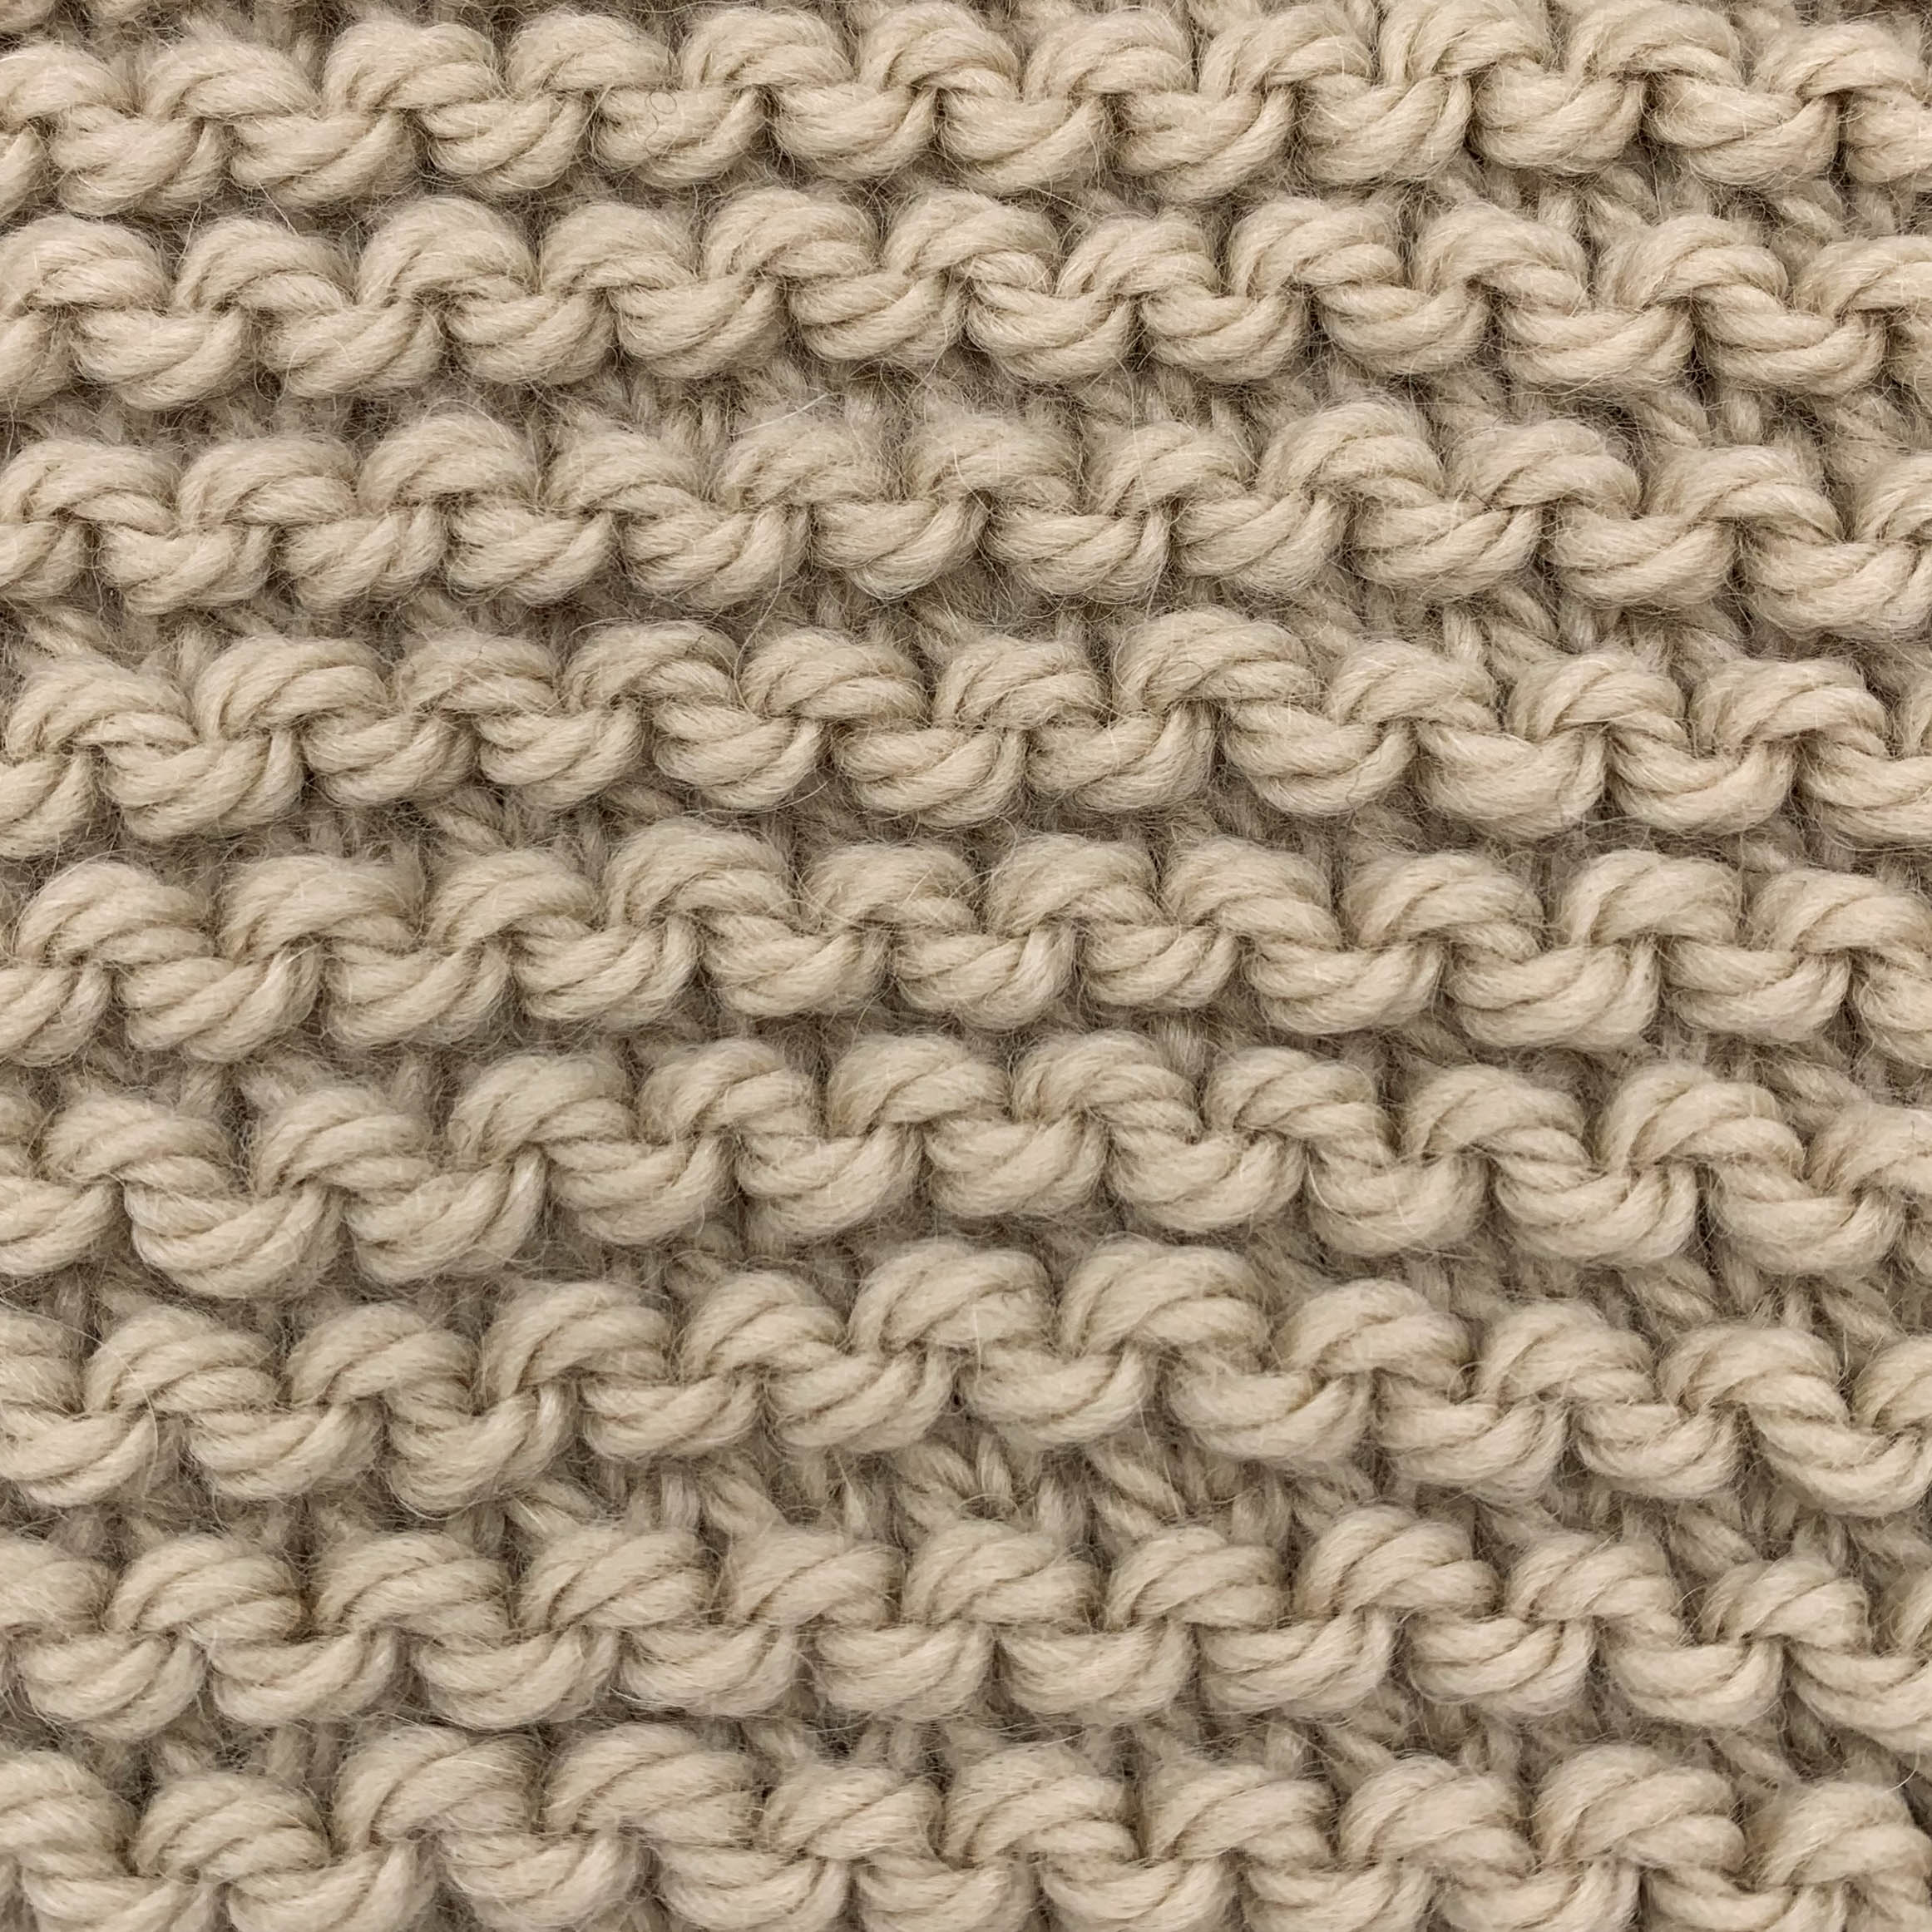
TIP: When you Knit each row over and over using just KNIT stitches, you are creating a stitch pattern commonly referred to as GARTER STITCH.
7. Join your new ball of yarn using the Magic Knot Method and continue knitting each row until your work measures 65” long.

8. BIND-OFF your stitches and leave a yarn tail approximately 8"-10" long
TIP: When binding off, ease up a bit on your stitch tension. If the tension along this edge is too tight, it will gather the end of your scarf and it won’t lay flat.
9. Weave in loose ends & proudly sew on your Project Weekend x Me. woven label..
OPTIONAL: ADD SOME FRINGE
Cut 112 pieces of yarn into 17.5” long lengths. Each end of your scarf will use 56 of these pieces.
Watch our Adding Fringe technique video for a quick & easy way to do this.
HOW TO ADD FRINGE TO YOUR PROJECT
TIP: When measuring out yarn to make fringe pieces, DO NOT STRETCH IT OUT!
Gently measure it and let it relax before cutting it to length. If the yarn is stretched out and then cut, it will relax back to shape an inch or two shorter than what you need.
Once all fringe pieces are cut, grab two of them and line them up evenly. Fold them both in half at the same time to create a loop. Insert your crochet hook through the first stitch or “hole” just above the cast on edge of your scarf.
Hook the loop of the folded yarn pieces and gently pull the loop back through the stitch approximately a third of the way. Slip the open yarn ends (there will be 4 ends) through the loop to create a knot. Gently pull it tight, adjusting the ends as you tighten the fringe to get them lined up and even.
Repeat the same process for each of the remaining 27 stitches along the edge of your scarf. Repeat the whole process again for the opposite scarf end.
TIP: Once finished, resist the urge to take a pair of scissors to the end of your fringe, or at most, just trim the few fringe pieces that may be a bit longer than the bulk of other pieces. Fringe has a much more beautiful and natural appearance when the ends are slightly different lengths.
Excited to learn more knitting techniques?
Check out our full library of videos.